


DAST
Installing Burp Suite DAST (Standard)
-
Last updated: March 18, 2026
-
Read time: 4 Minutes
This page explains how to set up a standard instance of Burp Suite DAST using the installer. You can run the installer on both on-premise and cloud-hosted machines.
Before installation
Before you install Burp Suite DAST, you should make sure that you have understand the prerequisites for standard installation, and have the relevant information to hand.
Step 1: Download the installer
Download the installer for Burp Suite DAST. The link below opens the download page for the latest stable release in a new tab.
Download the installer
Run the installer and click Next to display the Select Destination Directory page.
Step 2: Extract and run the installer
This step is specific to your operating system.
Windows:
-
Extract the installer
burpsuite_enterprise_windows-x64_vYYYY_MM.exefrom the installer zip file. - Right-click the installer file and select Run as administrator.
Linux:
-
Extract the installer
burpsuite_enterprise_linux_vYYYY_MM.shfrom the installer zip file. -
From the command line, run
sudo sh <installer-sh-file> -c.
Note
If you are using Security-Enhanced Linux (SELinux), you may experience issues when you install or run Burp Suite DAST. If this happens, we recommend you try the following steps:
- Set SELinux to permissive mode.
- Review your security policies.
Step 3: Choose an install location
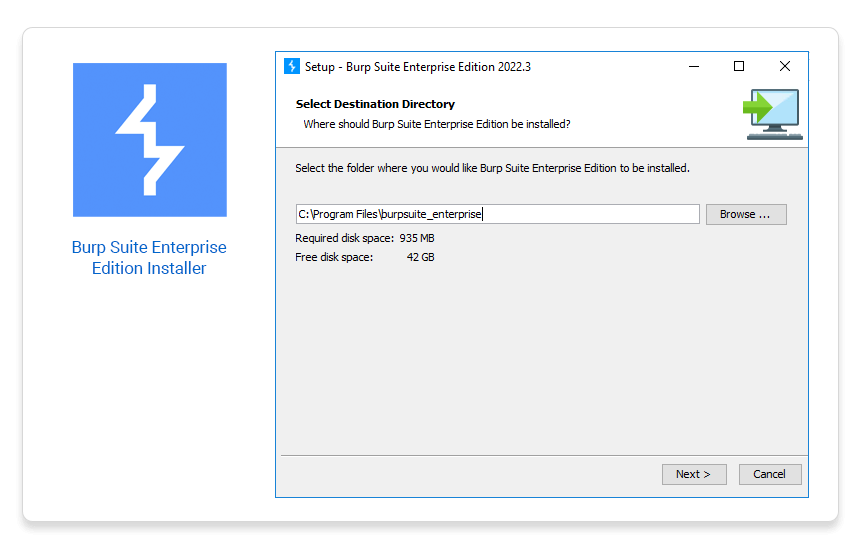
The destination directory is the directory in which the DAST server itself will be installed.
Enter or select a directory and then click Next to display the Installation options screen.
Step 4: Select the components to install

The Installation options screen enables you to choose which components of Burp Suite DAST you want to install on your machine.
Your choice depends on the system architecture you want to deploy:
- For a single-machine architecture - with the DAST server and scanning components all on the same machine - make sure that both the Running the DAST server and web server and Running scans boxes are selected.
- For a multi-machine architecture - with the DAST server and scanning components on separate machines - deselect Running scans to install only the server component.
Note
You need to install the scanning component on any machines that you want to run scans from. This is done using the same installer. For more information, see Deploying additional scanning machines.
Click Next to display the Logs Directory screen.
Step 5: Specify a logs directory
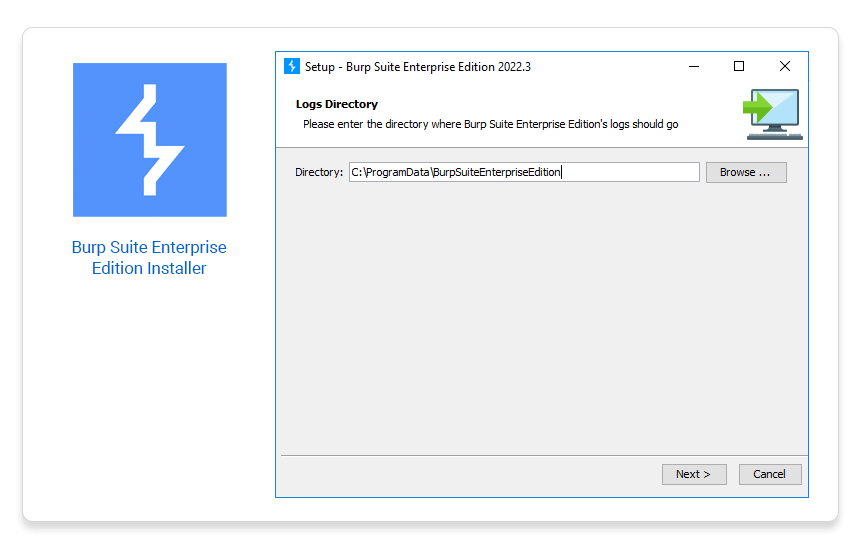
The logs directory is the folder that Burp Suite DAST saves all generated logs to.
Enter or select a directory and then click Next to display the Data Directory page.
Step 6: Specify a data directory

The data directory is the folder that Burp Suite DAST saves application data to.
Enter or select a directory and then click Next.
Note
For Linux installs, you'll see the Select User to Run Processes screen.
If you're using Windows, skip Step 7 and go straight to Step 8.
Step 7: Select a user to run processes
Enter the Username of the system user (that is, the user on your machine as opposed to a Burp Suite DAST user) that you want to run Burp Suite DAST processes under.
If this user does not already exist on your system then the installer creates a user at the end of the process with the default name burpsuite.
Click Next to display the Database screen.
Step 8: Select database options
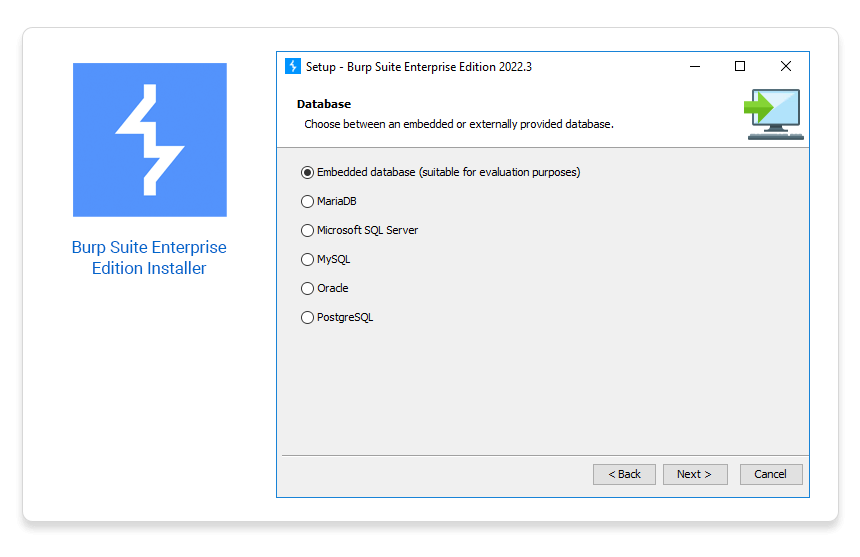
Select whether you want to use the Embedded database or your own external database. Only use the embedded database to evaluate Burp Suite DAST. It is not intended for production use.
Note
Any external database you want to use must meet the Burp Suite DAST database requirements. You should also make sure that you have correctly configured the database before proceeding. For more information, see Setting up the external database.
Click Next to display the Web Server Port screen.
Step 9: Specify a web server port
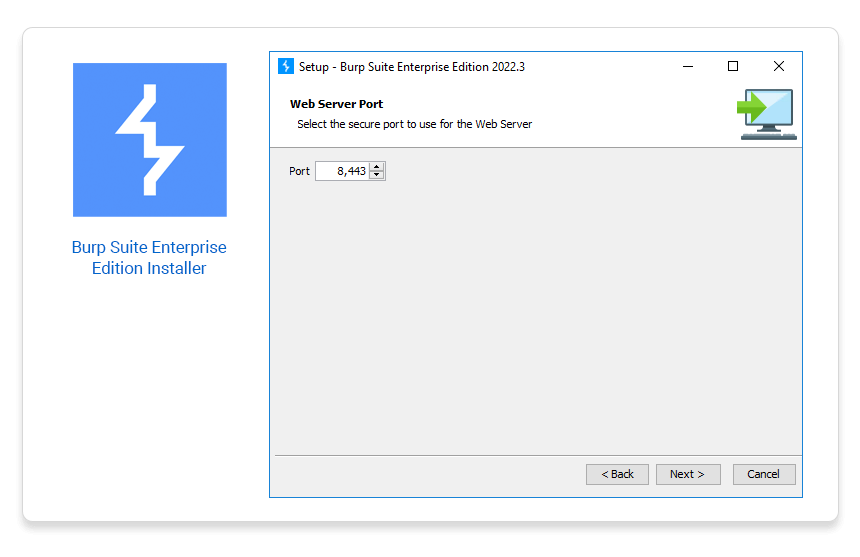
The web server port is the port through which you can access the Burp Suite DAST application in your browser.
By default, this is set to port 8080 if you are using the embedded database or 8443 if you are using an external database.
However, you can specify a different port number if this port is not available on your machine.
Any port you specify must meet the following requirements:
- The port must be available for use on the machine that you want to install the DAST and web servers on.
- The operating system user must be allowed to bind to that port. On Linux, low-privileged users are unable to bind to low port numbers (such as
80or433). If you want to use a low port number, you should configure port redirection at the OS level.
Click Next.
Note
The next step differs depending on whether you selected to use the embedded database or an external database:
- If you selected to use the embedded database then the installer displays the Database Backups Directory screen.
- If you selected to use an external database then the installer installs Burp Suite DAST on your computer. Once installed, it displays a confirmation screen.
Step 10: Specify a database backups directory
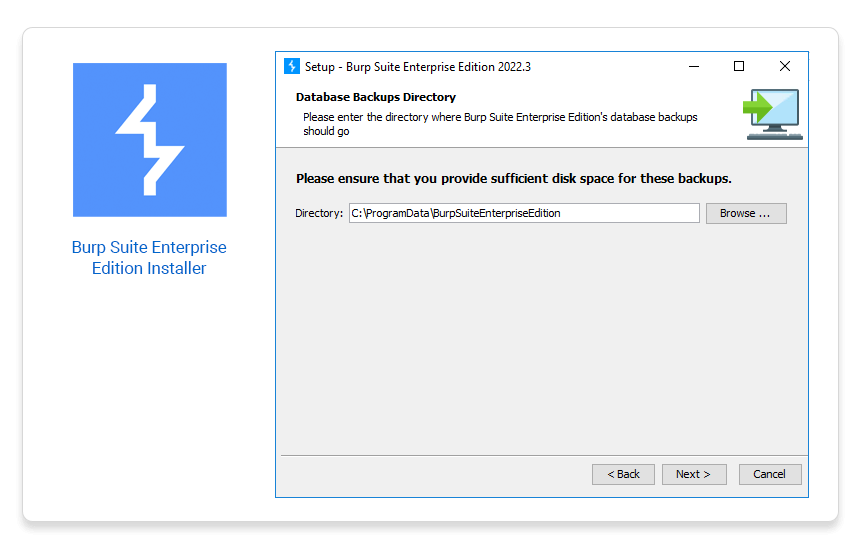
The database backups directory is the folder that Burp Suite DAST backs up the embedded database to.
Enter or select a directory and then click Next.
Note
If you're using Windows, you'll see the Select Start Menu Folder screen. Select a folder and click Next to install the application.
After installation
Now that you have installed Burp Suite DAST, you need to complete the final part of the configuration in the app itself. Access the app in your browser. By default, this should be http://localhost:8080 or https://localhost:8443.
Warning
There are potential security implications to leaving Burp Suite DAST in an unconfigured state. We recommend completing the rest of the configuration as soon as possible.
Next step - Configuring Burp Suite DAST