


DAST
Analyze your scan's results
-
Last updated: June 18, 2026
-
Read time: 2 Minutes
In this tutorial, we'll show you how to use the dashboards and analytics features to interpret the results of your scan and begin taking steps to resolve any issues.
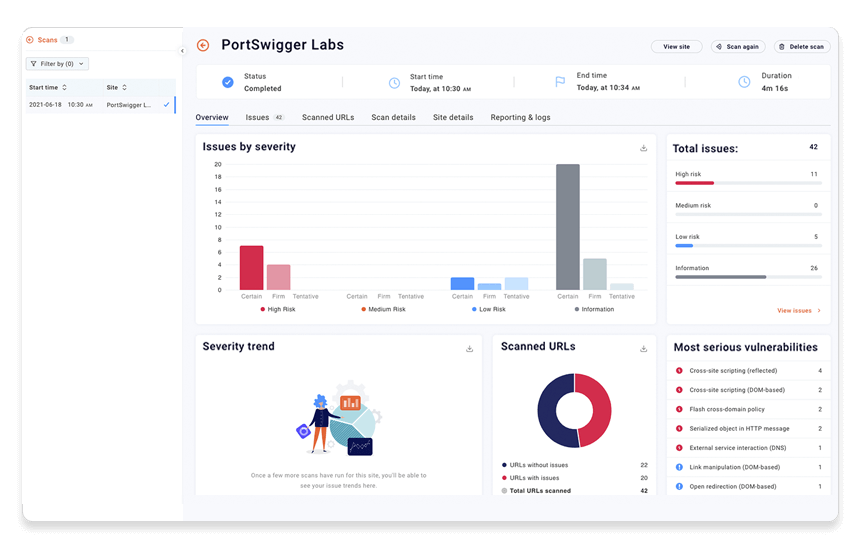
Step 1: Get a summary of your scan results
Select your scan and go to the Overview tab. This tab contains various charts that give you a quick snapshot of the scan's results. If your scan is still running, these are updated in real time as more issues are detected.
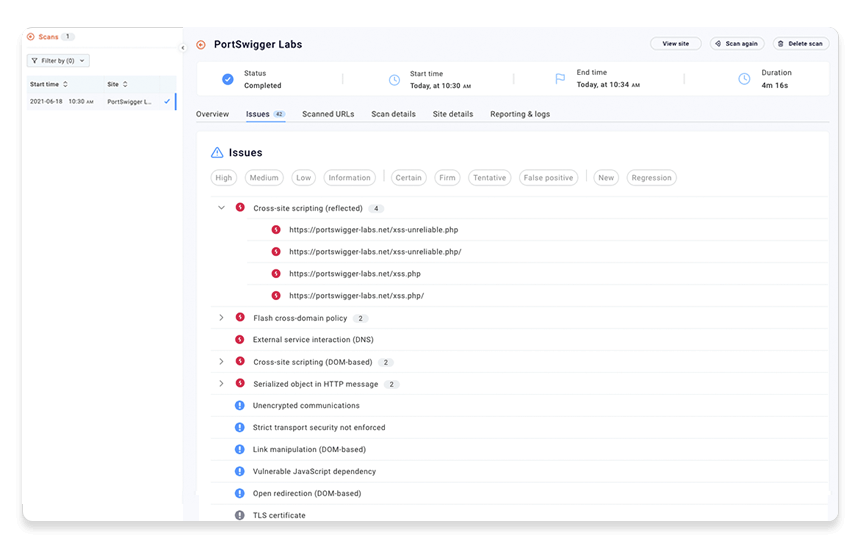
Step 2: Look at the identified issues
Go to the Issues tab to see a list of all security issues that have been identified by the scan so far. These are color-coded based on the estimated severity of the issue.
Issues are grouped by type. You can expand each issue type to see all of the URLs where it was detected.
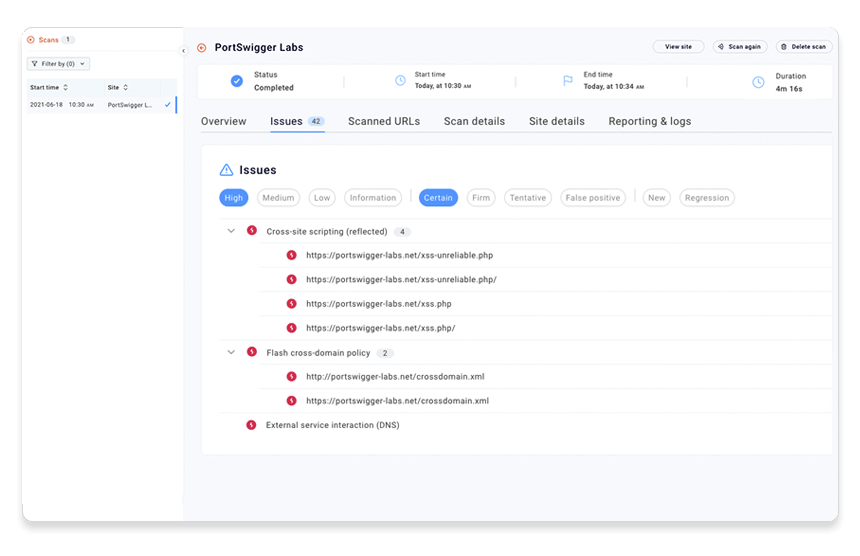
Step 3: Filter the issues list
When faced with a large number of issues, you'll want to prioritize. The buttons at the top of the list enable you to select issue severity and confidence levels to display.
Note
The confidence level is determined by the inherent accuracy of the techniques used to detect each type of issue. We strongly recommend that you confirm all reported issues manually.
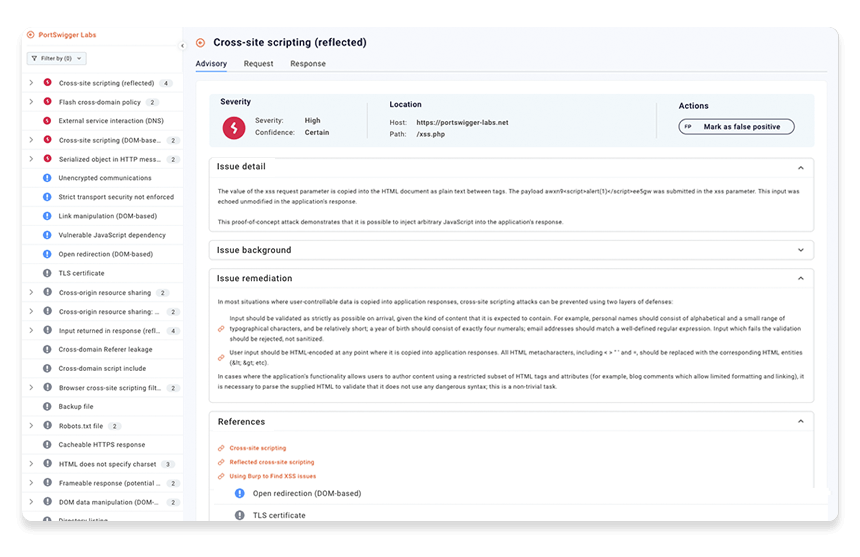
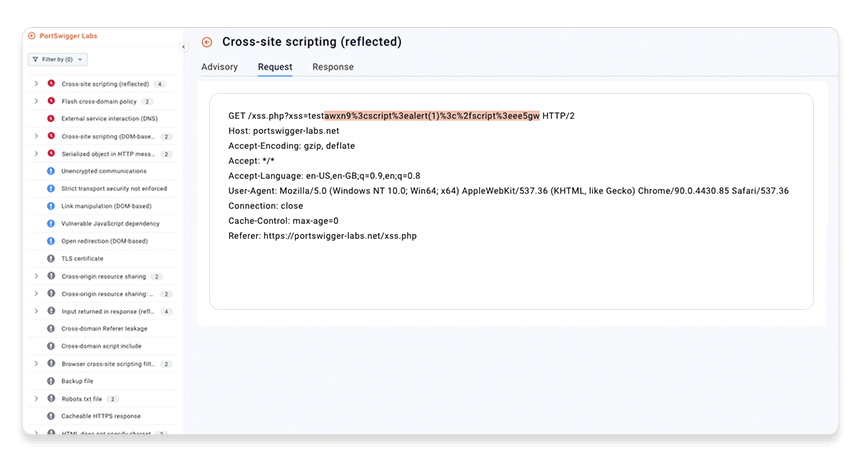
Step 4: Get more information about the issue
Select one of the URLs where an issue was detected.
The Advisory tab provides information to help you understand what the problem is and what actions you can take to resolve the issue. In some cases, you'll find links to the Web Security Academy, where you can practice exploiting the issue yourself on a series of deliberately vulnerable websites.
Step 5: Examine the evidence
The Request and Response tabs display the evidence that Burp Scanner has found for the issue. The kind of evidence available depends on the issue type.
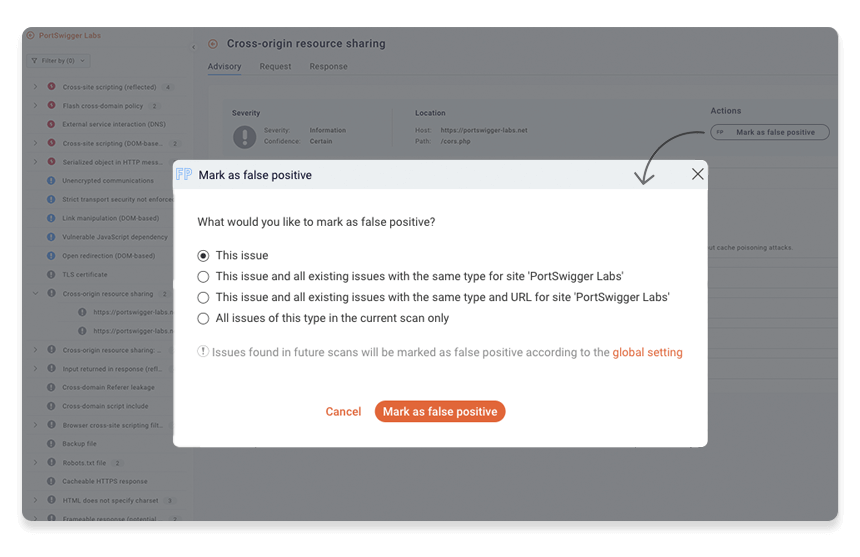
Step 6: Exclude false positives
After manually reviewing a reported issue, you may decide that it is a false positive. To mark an issue as a false positive, select it and then click Mark as false positive.
You are prompted to apply this change to similar issues found elsewhere on the site, but for now, just accept the default setting.
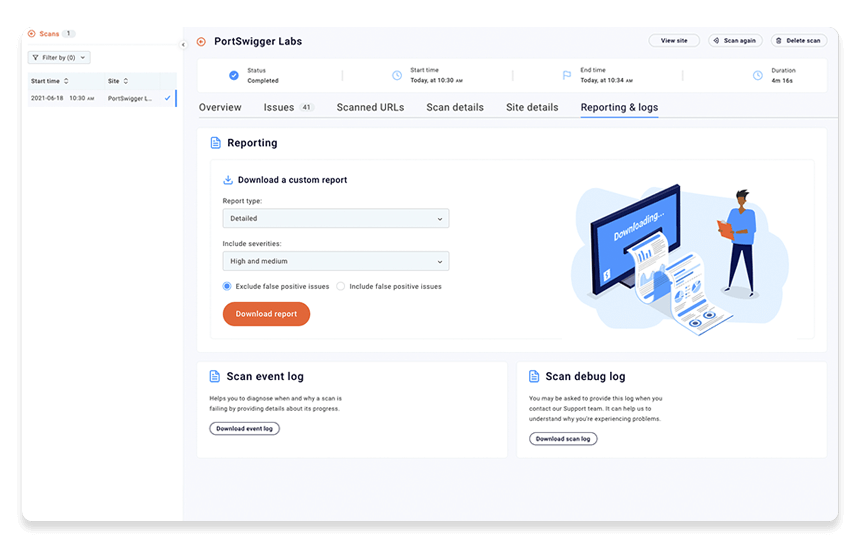
Step 7: Report your findings
You'll often want to report the results of your scan to other stakeholders who don't have access to Burp Suite DAST. For example, you need to pass details of any findings to your development teams so that they can work on a fix.
Go back to the scan and open the Reporting tab. From here you can select the type of report you want to download and which severities should be included. See Downloading reports for more information.
Working with scan results
To learn more about working with scan results, check out the following video for a guided tour of the basics: