


DAST
Run your first scan
-
Last updated: June 18, 2026
-
Read time: 2 Minutes
In Burp Suite DAST, you create "sites" to represent any websites or web applications that you want to scan. The first time you run Burp Suite DAST, an onboarding wizard helps you to add your first site and then run a scan on it.
Step 1: Select a target for your scan
The first step of the wizard prompts you to select whether you want to scan your own target app or a deliberately-vulnerable test site (https://vulnerable-website.com).
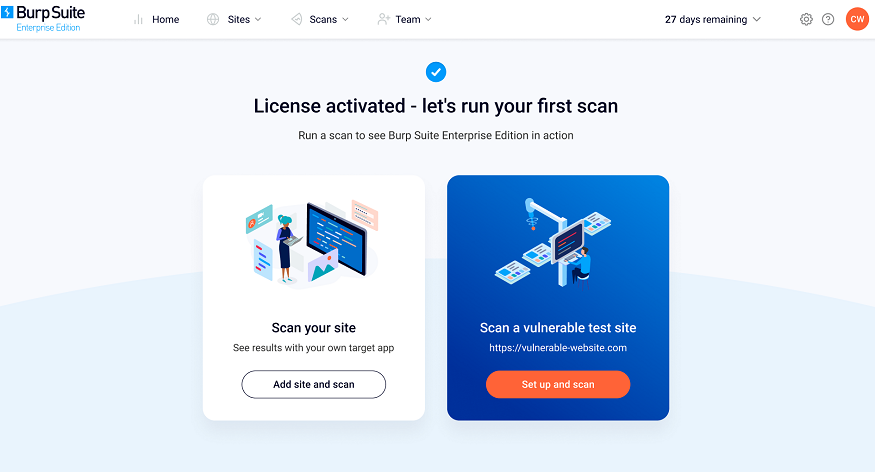
Select an option to display the Add a site page:
- To scan your own site and get "real world" results straight away, click Scan your site.
- To use the test site and see how Burp Suite DAST displays vulnerabilities of varying severity, click Set up and scan.
Step 2: Add your first site
The next step of the onboarding wizard prompts you to add your first site.
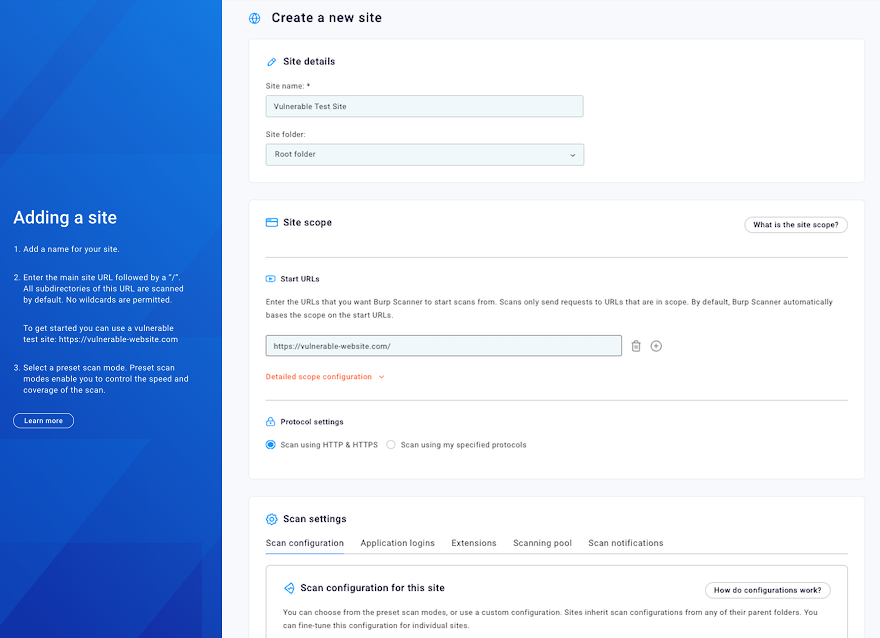
Start by entering a Site name. This can be anything you like. If you are scanning the test site this field is already populated with Vulnerable Test Site.
Next, enter a Start URL. This is the URL from which all scans of the site start. Any sub-paths of the URL are included in the scope of the scan by default. If you are scanning the test site this field is already populated with https://vulnerable-website.com/.
Note
Using Burp Scanner may have unexpected effects on some applications. Until you are fully familiar with its functionality and settings, you should only run scans against non-production systems. Do not run scans against third-party websites unless you have been authorized to do so by the owner.
For the scan configuration, you can choose from four preset modes that enable you to adjust the balance of speed and coverage. For this first scan, select Lightweight. The lightweight mode completes within 15 minutes.
Leave all the other options as their defaults and click Next: Set up scan to display the Schedule scan page.
Step 3: Schedule a scan
You're now presented with scan scheduling options.
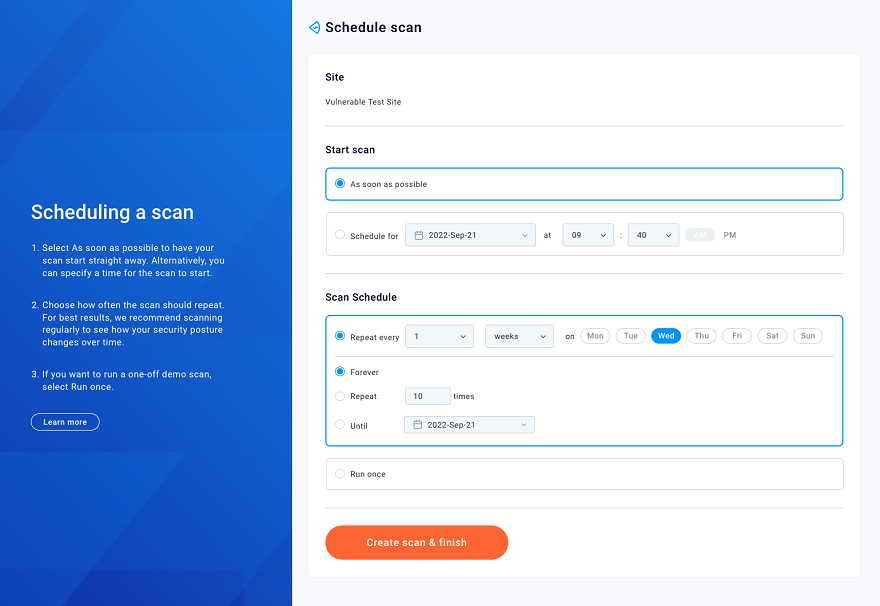
By default, scans start immediately and repeat weekly. You can use the Start scan and Scan schedule options to change the scan's start time and frequency if required.
Click Create scan & finish to start the scan and open the Timeline tab.
Step 4: View more details
You can click on the individual scan to view more details. On the Timeline tab, you can monitor the scan progress, and see an estimate of the time remaining. You can also see issues as they're discovered in real time. Use the Issues tab to see more details about an issue, we'll look closer at this tab in the next tutorial once the scan has finished.

Next step - Analyze the results of your scan