


DAST
Integrating Burp Suite DAST with Jira
-
Last updated: June 18, 2026
-
Read time: 4 Minutes
This section explains how to integrate Jira so you can raise Jira tickets directly from Burp Suite DAST.
Note
-
If you're a Cloud user, you need to use Jira Cloud and host on
*.atlassian.com. - For self-hosted instances, we support integration for both Jira Cloud and Jira Data Center.
Supported versions of Jira
Burp Suite DAST supports integration with Jira Cloud and Jira Data Center up to 10.x. The oldest supported version is 8.4.1.
Supported certificate types
When integrating Jira with Burp Suite DAST, make sure that your Jira instance uses the right type of certificate for your deployment model:
SaaS deployments: Your Jira instance must use a CA-signed certificate.
On-premise deployments (standard and Kubernetes): Your Jira instance can use either a CA-signed or a self-signed certificate. To upload or delete certificates, go to Settings > Network > Manage certificates.
Create a new Jira user (Recommended)
To integrate with Jira, Burp Suite DAST must be linked to a specific Jira user.
All Jira projects that the user has permission to create tickets in will be exposed to Burp Suite DAST. For this reason, we recommend creating a new Jira user specifically for the integration.
Generate a Jira API token (Jira Cloud only)
If you want to integrate a cloud-based Jira installation, you first need to create a Jira API token. Burp Suite DAST uses this to authenticate itself with Jira.
- Log in to Jira as the user that you want to use for the integration.
- In Jira, click your user icon and open your account settings.
- From the account settings page, select Security.
- Click Create and manage API tokens.
- Click Create API token.
- Enter a label for the token and click Create.
- Copy the token to your clipboard and save it somewhere secure.
Note
You will not be able to view or copy this token again once you close the popup.
Connect Burp Suite DAST to Jira
To connect Burp Suite DAST to Jira:
- Log in to Burp Suite DAST as an administrator.
- From the settings menu, select Integrations.
- On the Jira tile, select Configure.
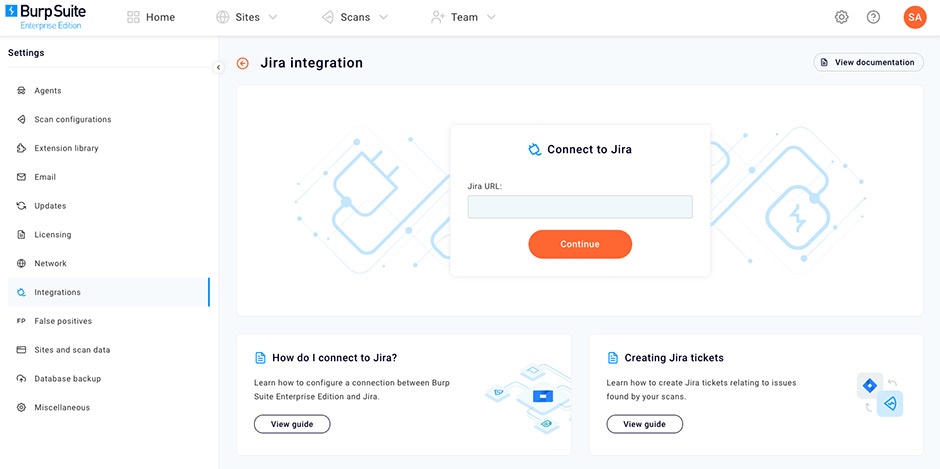
- Enter the URL for your Jira server in the Jira URL field.
-
Click Continue.
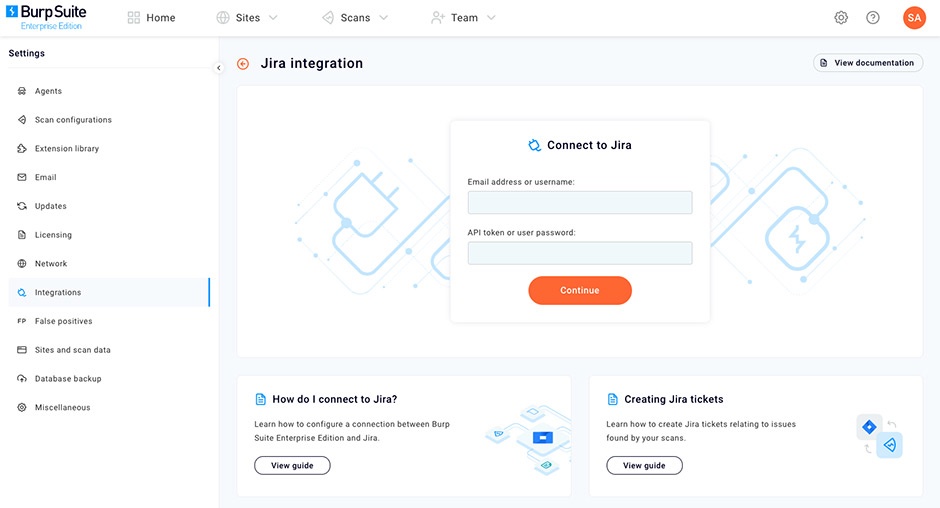
- The next step depends on whether you use Jira Cloud or Jira Data Center:
- For Jira Cloud, enter the email address and the API token of the Jira user that you created earlier. Click Continue.
- For Jira Data Center, enter the username and password of the Jira user that you created earlier. Click Continue.
If Burp Suite DAST successfully connects to Jira, you'll be presented with options to configure both manual and automatic ticket creation.
Enable users to manually raise Jira tickets
To enable users to raise Jira tickets manually in Burp Suite DAST, configure the list of Jira projects and ticket types that they can choose from:
- From the settings menu , select Integrations and find the Jira panel. Click Edit.
- Under Raise tickets manually, click Add rule.
- Enter a name for the rule. You can also add a description.
- Click Next.
- Select a project from the Project drop-down list. Start typing to search the available projects.
- Select a ticket type from the Ticket type drop-down list. Start typing to search the available ticket types.
- If required, select a parent from the Parent drop-down list. Start typing to search the available Jira parents.
- Click Next. The Custom ticket fields tab opens.
Adding custom ticket fields
Burp Suite DAST detects if your Jira project has fields that are compulsory when you raise a ticket. The Custom ticket fields tab enables you to automatically fill these fields.
You can also add custom ticket fields that are optional.
Note
We currently support the following ticket field types:
- Text strings
- Numbers
- Single select lists
- Multi-select lists
If your project requires fields that are a different type, Burp Suite DAST won't be able to raise tickets.
To automatically fill custom ticket fields:
- In the Custom ticket fields tab, enter a Jira value for each Required Jira field.
-
To add a Jira value to an optional custom field:
- Click Add more fields.
- Enter values for your Jira field and Jira value.
- To add an additional custom field, click the Configure optional fields button.
- Click Save.
You can repeat these steps to add more projects and ticket types.
Note
You need to add separate rules to enable users to raise different Jira ticket types.
Related pages
- To learn how to raise Jira tickets automatically, see Raising Jira tickets automatically.
- To learn how Burp Suite DAST manages duplicate tickets, see Managing Jira ticket duplication.