DAST
Integrating a CI-driven scan with Jenkins
-
Last updated: March 18, 2026
-
Read time: 3 Minutes
This page contains instructions to integrate a CI-driven scan with Jenkins. This enables you to use Burp Scanner to run web vulnerability scans as a stage in your existing CI/CD pipeline, and fail builds if vulnerability thresholds are met.
You configure the scan by defining a set of simple parameters in a YAML file. To learn how to configure the scan, see Creating a configuration file for CI-driven scans.
These instructions have been tested with Jenkins version 2.387.3.
Before you start
You need to complete the following steps before you start:
- Deploy Burp Suite DAST. See Planning to deploy Burp Suite DAST.
- Create an API user in the CI-driven scan initiator group, and save the API key. See Creating API users.
- Save the configuration for your CI-driven scan as a YAML file. See Creating a configuration file for a CI-driven scan.
Jenkins server requirements
To integrate a CI-driven scan with Jenkins:
- Your Jenkins server or build node must have Docker installed.
- No plugins beyond the Jenkins defaults are required to run a CI-driven scan in a Jenkins CI/CD pipeline.
For information on the machine specification required to run a CI-driven scan, see System requirements for CI-driven scans.
Configuring the Jenkins pipeline
- From the Jenkins Dashboard, click New Item.
-
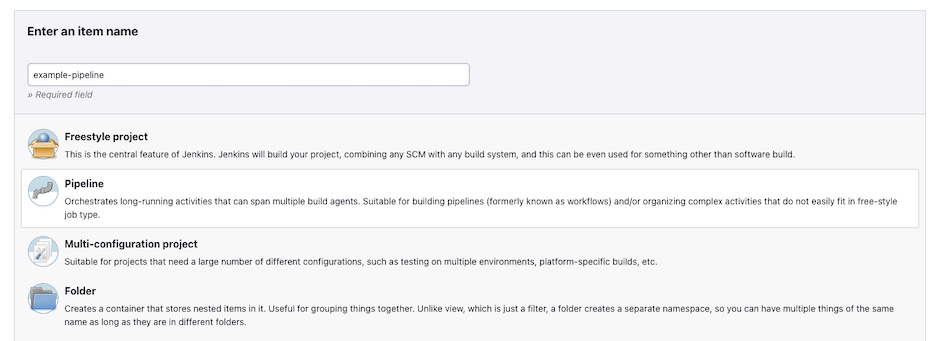
Enter an item name for your pipeline, click Pipeline, then click OK.
- You can give your pipeline a Description.
- From the side menu, click Pipeline.
- From the Definition drop-down, select Pipeline script from SCM.
-
Configure the Pipeline section to point to the relevant
Jenkinsfilein your code repository. You must include any credentials used to access the repository. -
Click Save.

Setting the configuration of your scan
To set the configuration for your scan, save your configuration file as burp_config.yml in the root of your application.
To learn how to create and edit the configuration file, see Creating a configuration file for a CI-driven scan.
Creating the Jenkinsfile
Create a Jenkinsfile in the corresponding location in your code repository. Add the following content to the file:
// Jenkinsfile for integration of a Burp Suite DAST CI-driven scan.

pipeline {
  agent any
  stages {
    stage ("Docker Run Example Scan") {
      steps {
        sh '''
            docker run --rm --pull=always \
            -u $(id -u) -v ${WORKSPACE}:${WORKSPACE}:rw -w ${WORKSPACE} \
            -e BURP_CONFIG_FILE_PATH=${WORKSPACE}/burp_config.yml \
            public.ecr.aws/portswigger/enterprise-scan-container:latest
        '''
      }
    }
  }
  post {
    always {
      junit testResults: 'burp_junit_report.xml', skipPublishingChecks: true, skipMarkingBuildUnstable: true, allowEmptyResults: true
        cleanWs()
    }
  }
}
Viewing scan results in Jenkins
To view the results of your scan:
- Access the scan results by clicking the most recent build under Build History.
- Click Test Result. Here you can see any failed tests. See more details of a failed test by clicking it.
Remediation advice
You can see remediation advice for security issues that Burp Scanner finds under Stacktrace. This includes links to relevant sections of the free Web Security Academy resource, which provide further detail on web security vulnerabilities.

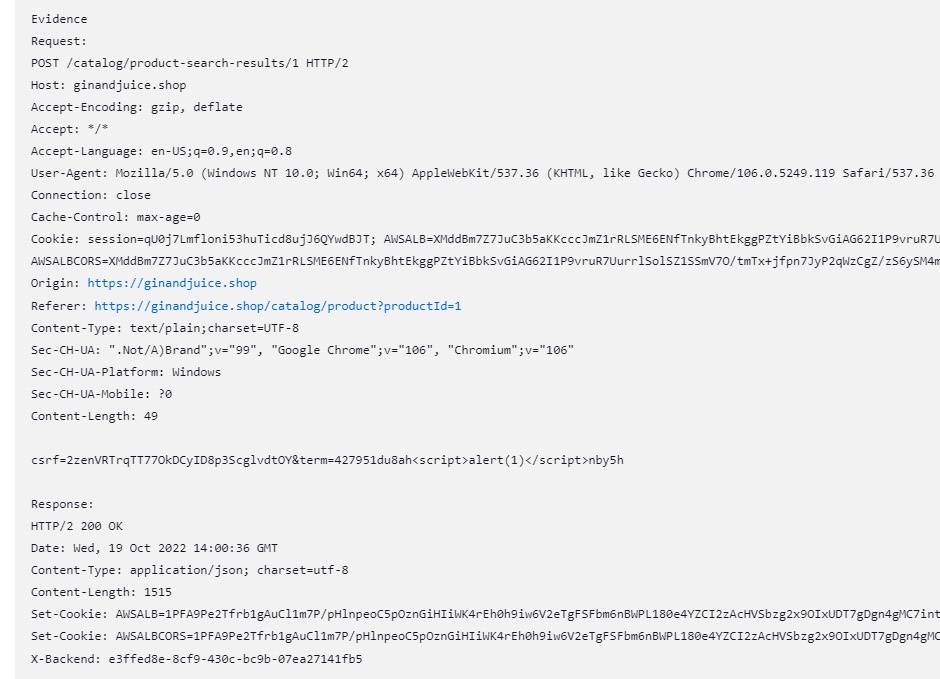
Evidence
You can see evidence for security issues that Burp Scanner finds under Stacktrace. This evidence includes the request sent by Burp Scanner to produce the issue, as well as the response sent by the application.