


ProfessionalCommunity Edition
Viewing requests sent by Burp extensions using Logger
-
Last updated: March 18, 2026
-
Read time: 2 Minutes
Many extensions modify requests that you've sent, or generate their own. These requests are not logged in the HTTP history, which only displays traffic from a browser that is proxied through Burp.
In this tutorial, you'll learn how to use the Burp Logger to view requests from an extension. This can help you understand how an extension works or troubleshoot unexpected behavior.
Step 1: Send requests using an extension
Open Burp's browser and go to https://portswigger-labs.net/, a deliberately vulnerable test domain. Always make sure that you use a website that you have permission to test.
Run a scan on the domain with the ActiveScan++ extension.
Note
We use the ActiveScan++ extension for demonstration purposes. You could use any extension for any Burp tool that sends requests. For more information on how to add an extension, see Installing extensions from the BApp Store.
Step 2: Go to the Logger tab
View the scan's HTTP traffic in the Logger tab. This is updated in real-time. Notice that the traffic is not displayed in the HTTP history tab, which only records requests sent from Burp's browser.
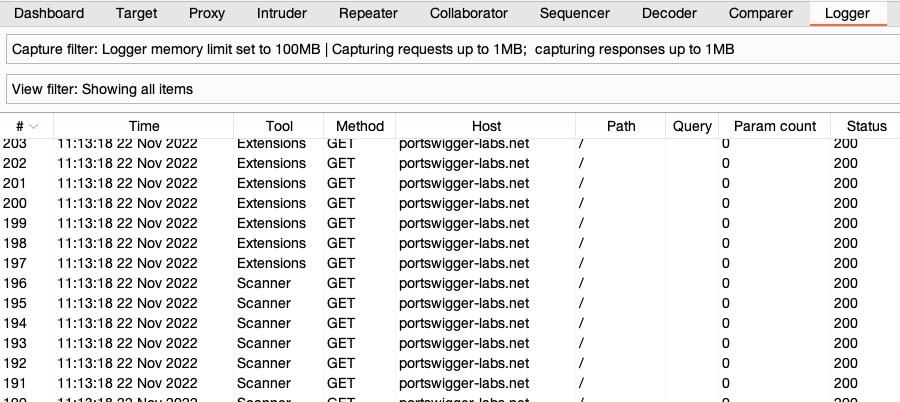
To show or hide columns, use the drop-down Columns menu. Ensure that you can see the Tool column, which identifies the tool that sent each request.
Note
You can view a task-specific log for this scan from the Dashboard tab. For information on how to view this, see Task Logger.
Step 3: Filter the log
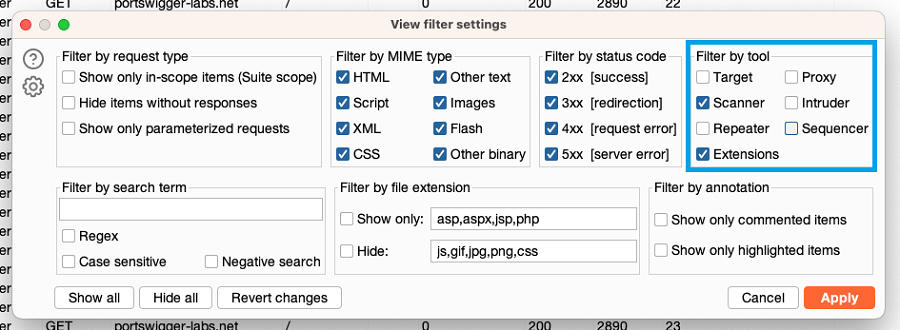
Click the View filter bar. To view only requests sent by the extension, select Scanner and Extensions in the Filter by tool settings. Deselect all other tools.
Note
If an extension generates a request from scratch, it is listed under Extensions. However, any requests that are simply modified by an extension are listed under the original tool that made the request. Both Scanner and Extensions are selected for this tutorial as the ActiveScan++ extension modifies existing requests and also generates its own.
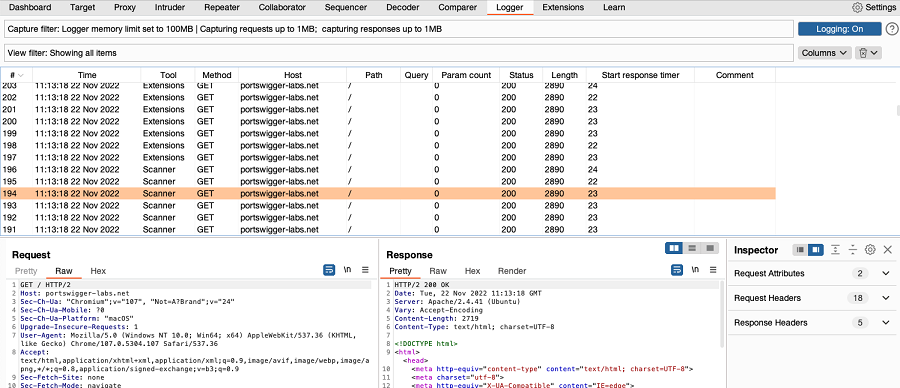
Step 4: View individual requests
To view the request and response in the message editor, click on any entry. You can view potentially interesting features of the message in the Inspector panel.
Summary
This tutorial showed you how to use Burp Logger to view requests made by a Burp extension. For more documentation on the Logger tab, see Burp Logger.