ProfessionalCommunity Edition
Testing for stored XSS with Burp Suite
-
Last updated: February 6, 2026
-
Read time: 3 Minutes
Stored XSS arises when an application receives data from an untrusted source and includes that data within its later HTTP responses in an unsafe way. In a stored XSS attack, the attacker places their exploit into the application, but the exploit only executes when a user visits a particular location. For example, an attacker may place an exploit in a blog post comment that later executes when a victim user visits the blog post.
While Burp Scanner can detect stored XSS, you can also use Burp to manually identify linked input and output points in the application, then test these links to determine whether a stored XSS vulnerability is present.
Steps
You can follow along with the steps below using the Stored XSS into HTML context with nothing encoded Web Security Academy lab.
Identifying linked input and output points
To test for stored XSS with Burp Suite, you first need to identify points where user input is stored and then later displayed by the application:
- Go to Proxy > Intercept and set the intercept toggle to Intercept on. Burp will now intercept each request and display the message details in the Intercept tab.
-
In Burp's browser, click around the website. As you browse, review each request in the Intercept tab:
- Identify data entry points that may be vulnerable to stored XSS.
- Submit a unique value into each of the identified data entry points.
- Click Forward to send the request.
-
In Proxy > HTTP history, filter the messages to identify any responses that include the unique values:
- Click on the filter bar.
- Under Filter by search term, enter the unique value.
- Click Apply. The HTTP history tab now only shows messages that include the unique value.
- Review the messages in the HTTP history tab to identify any linked input and output points.
Testing for stored XSS
Once you've found linked input and output points, you can test these for stored XSS:
- In Proxy > HTTP history, right-click the request that results in the input being stored. Select Send to Repeater. Do the same for the later request that results in the input being displayed.
- Go to the Repeater tab.
-
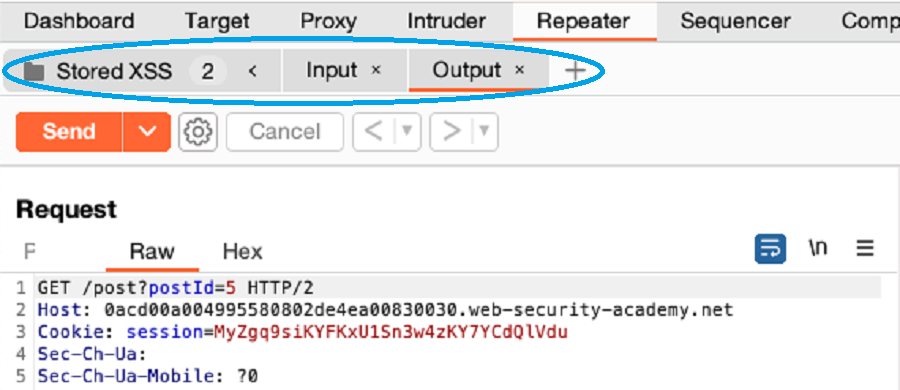
Create a group in Repeater that includes the two messages:
- Right-click a message tab in Repeater and select Add tab to group > Create tab group.
- Add both messages to the folder.
- Click Create.
- Drag the messages to place the input message before the output message.

- In the input request, change the data entry point to a proof-of-concept XSS payload. For example,
<script>alert(1)</script>. - Click the Send drop-down menu, then select Send group in sequence (separate connections).
- Click Send group (separate connections) to send the request.
- Right-click on the output and select Show response in browser. Burp Suite displays a dialog containing a URL.
- Copy and paste this URL into your browser to see if the proof of concept ran successfully. If you used the
alert()function in your payload, you should see an alert pop-up.


