


ProfessionalCommunity Edition
Decoding opaque data with Burp Suite
-
Last updated: July 23, 2026
-
Read time: 2 Minutes
Burp Suite includes multiple tools for working with opaque data that isn't human-readable. You can use these while you analyze the attack surface, in order to review the information being transmitted and better understand how the application works. For example, you may be able to see whether the opaque data contains any information such as a username or timestamp, or whether you can edit the opaque data to impact the response.
You can use the following tools to decode and work with opaque data in Burp Suite:
- The Inspector
- Burp Decoder
You can follow along with the processes below using the Modifying serialized data types lab.
Investigate opaque data with the Inspector
You can use the Inspector to perform URL and Base64-decoding, and to modify decoded data as you work.
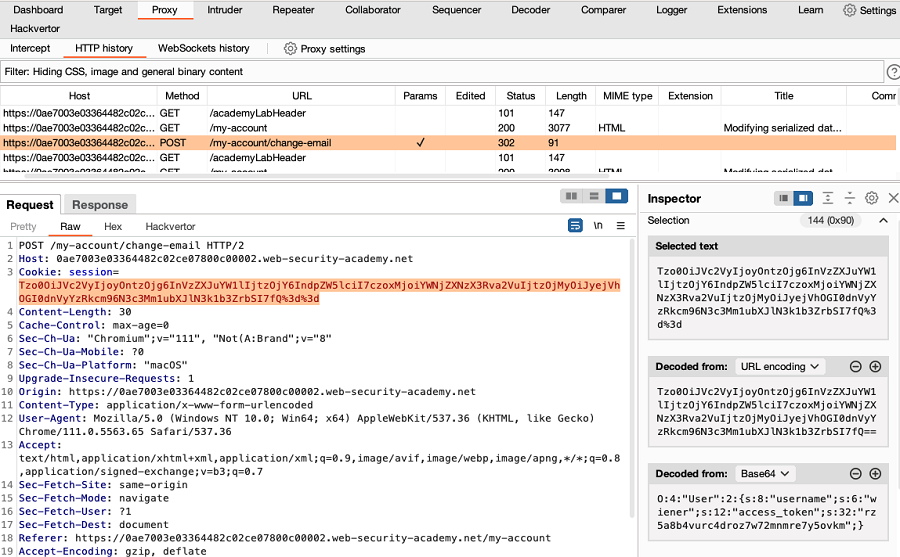
- Identify a message that includes opaque data, such as a session token.
-
In Proxy > HTTP History, highlight the data that you want to study. Notice that the selected text is shown in the Inspector panel. If Burp recognizes an encoding format, it automatically decodes the data. The decoded text is also shown in the Inspector panel.
If the data is decoded in the Inspector panel, you can modify the decoded data in the panel to see how this impacts the response:
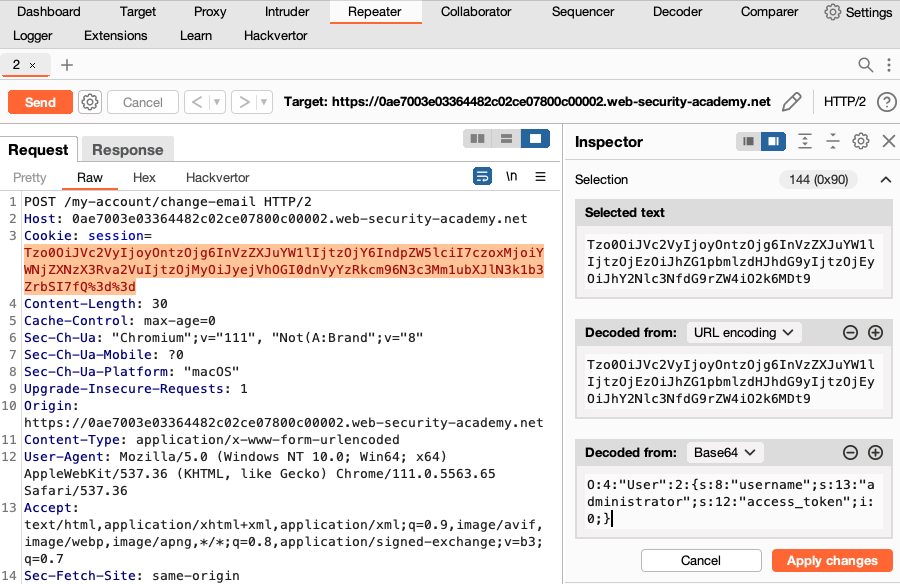
- Right-click the request and select Send to Repeater.
- Go to the Repeater tab. Highlight the data, then edit the data in the Inspector panel.
-
Click Apply changes. The edited data is re-encoded and updated in the request.
- Send the request.
- Review the response to determine how the modification impacted the application.
Investigate opaque data with Burp Decoder
You can use Burp Decoder to apply a wider range of different decoding and encoding functions to opaque data.
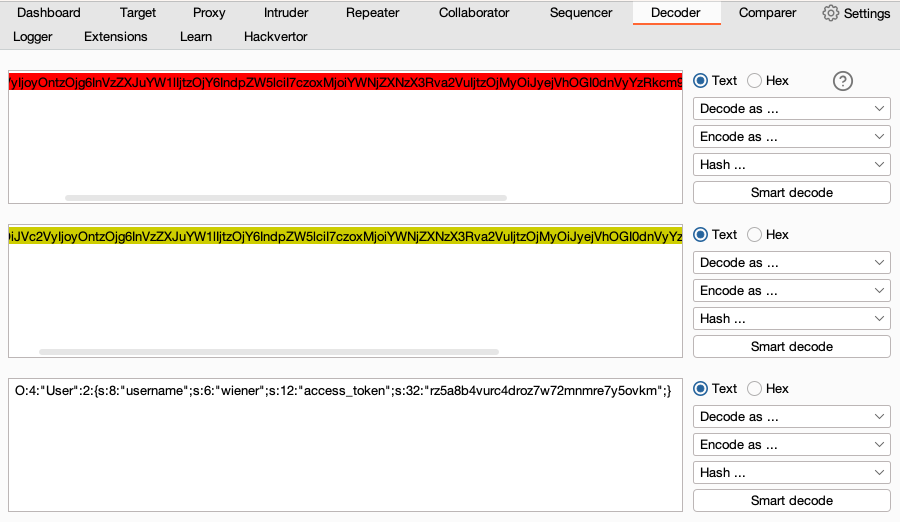
- In Proxy > HTTP History highlight the data that you want to study. Right-click and select Send to Decoder.
- Go to the Decoder tab. Click Decode as, then select a decoding function from the drop-down menu. Burp applies the decoding function to the data in a new panel.
- If required, apply another decoding function. Beside the decoded data panel, click Decode as, then select a function from the drop-down menu.
-
Continue to apply decoding functions as required. In this example, URL-decoding is applied, then Base64-decoding.
- Edit the decoded data in Burp Decoder.
- Re-encode the data. Beside the final decoded data panel, click Encode as, then select an encoding function from the drop-down menu.
-
Continue to apply encoding functions as required. In this example, the decoded data is edited, then Base-64-decoding and URL-decoding are applied.
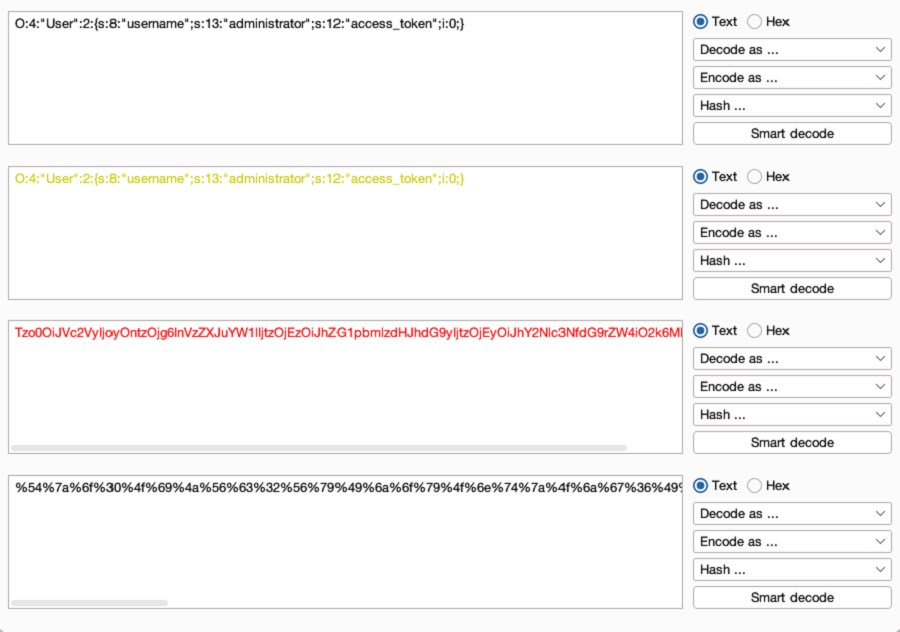
- Copy the re-encoded data. You can now insert it into the original request.