


ProfessionalCommunity Edition
Set the target scope
-
Last updated: July 28, 2026
-
Read time: 2 Minutes
In this tutorial, you'll learn how to set the target scope for your work in Burp Suite. The target scope tells Burp exactly which URLs and hosts you want to test. This enables you to filter out the noise generated by your browser and other sites, so you can focus on the traffic that you're interested in.
Web Security Academy
To follow along, you'll need an account on portswigger.net. If you don't have one already, registration is free and it grants you full access to the Web Security Academy.
If you haven't completed our previous tutorial, we recommend doing so before continuing. See Modifying HTTP requests with Burp Proxy.
Step 1: Launch Burp's browser
Launch Burp's browser and use it to visit the following URL:
https://portswigger.net/web-security/information-disclosure/exploiting/lab-infoleak-in-error-messages
When the page loads, click Access the lab. If prompted, log in to your portswigger.net account. After a few seconds, you will see your own instance of a fake shopping website.
Step 2: Browse the target site
In the browser, explore the site by clicking on a couple of the product pages.
Step 3: Study the HTTP history
In Burp, go to the Proxy > HTTP history tab. To make this easier to read, keep clicking the header of the leftmost column (#) until the requests are sorted in descending order. This way, you can see the most recent requests at the top.

Notice that the HTTP history shows details about each request that the browser has made, including requests to third-party websites that you're not interested in, such as YouTube and Google Analytics.
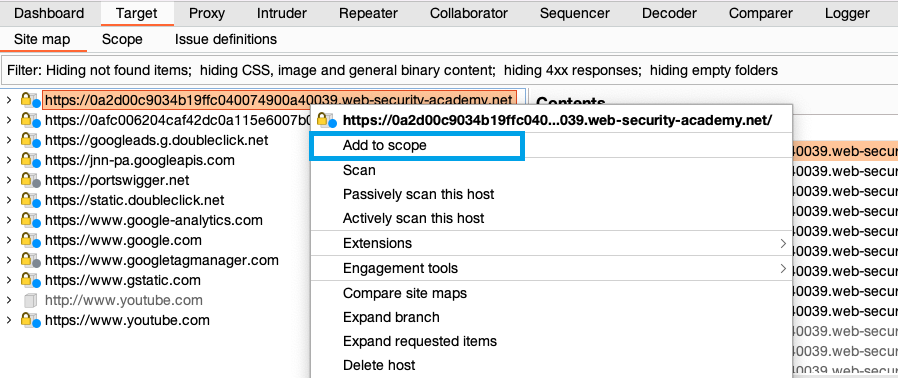
Step 4: Set the target scope
Go to Target > Site map. In the left-hand panel you can see a list of hosts that your browser has interacted with. Right-click on the node for the target site and click Add to scope. When prompted in a pop-up window, click Yes to exclude out-of-scope traffic.
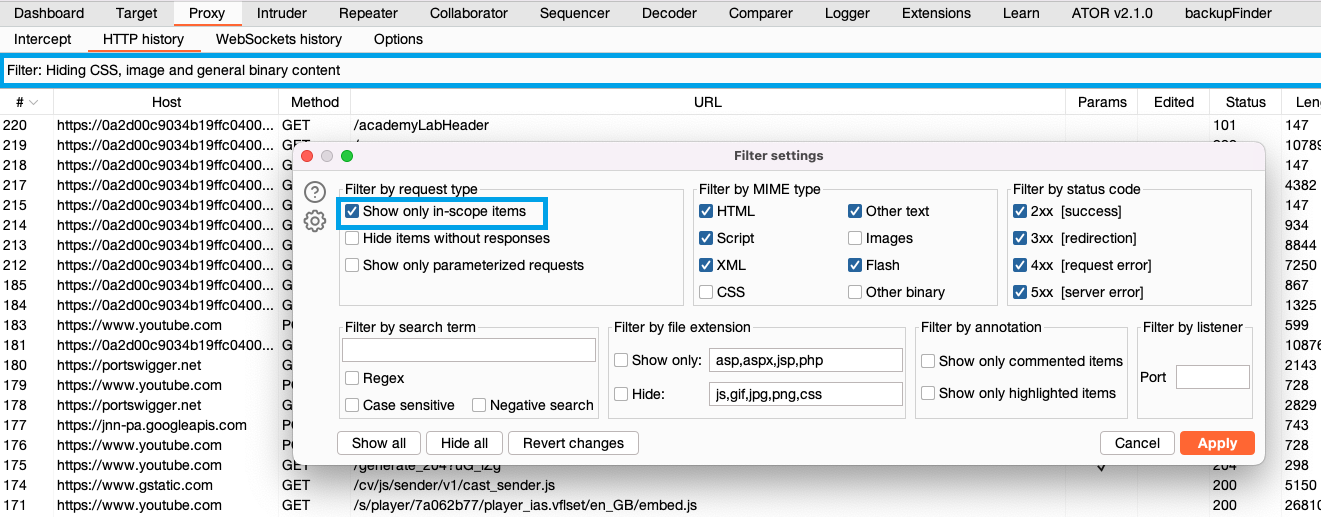
Step 5: Filter HTTP history
Click on the display filter above the HTTP history and select Show only in-scope items.
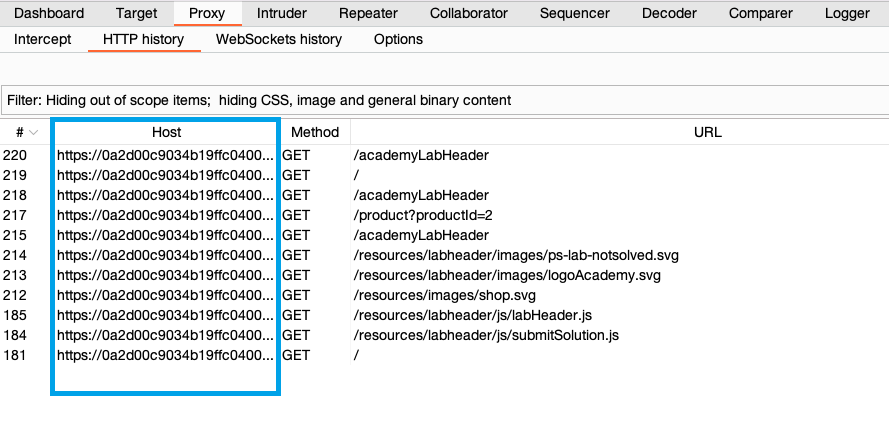
Scroll back through your HTTP history. Notice that it now only shows entries from the target website. All other entries have been hidden. This greatly simplifies the history to only include items you're interested in.
If you continue to browse the target site, notice that out-of-scope traffic is no longer logged in the site map or proxy history.
Congratulations, you've successfully set the target scope and used it to simplify your HTTP history. In the next section you'll build on this work to complete the lab.
Next step - Reissuing requests with Burp Repeater
CONTINUE