ProfessionalCommunity Edition
Testing for DOM XSS using web messages
-
Last updated: February 6, 2026
-
Read time: 4 Minutes
DOM Invader provides a number of features that let you test for DOM XSS using web messages. These include:
-
Logging any web messages that are sent via the
postMessage()method on the page, along with useful details about them. This is similar to how Burp Proxy shows the history of your HTTP requests and responses. -
Enabling you to modify and resend web messages to manually probe for DOM XSS vulnerabilities. This is similar to how Burp Repeater reissues modified HTTP requests.
-
Automatically modifying and sending web messages to probe for DOM XSS on your behalf.
You can access all of these features from DOM Invader's Messages view.

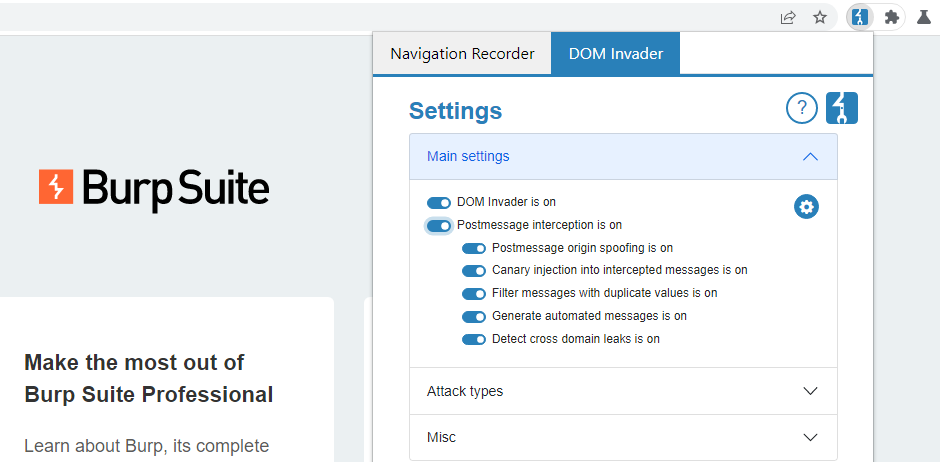
Note that you first need to enable Postmessage interception from the DOM Invader settings menu in order to use these features. For more information, see Main settings.
Web Security Academy
If you need to brush up on web message-based DOM XSS, check out the Web Security Academy, where you can also find some deliberately vulnerable labs to practice on.
Enabling web message interception
To avoid interfering with your target site's functionality, DOM Invader's web message features are disabled by default.
To enable these features:
-
Go to the DOM Invader settings menu.
-
Select the Postmessage interception switch.
-
Click Reload to reload the browser. This is necessary for your changes to take effect.

Identifying interesting web messages
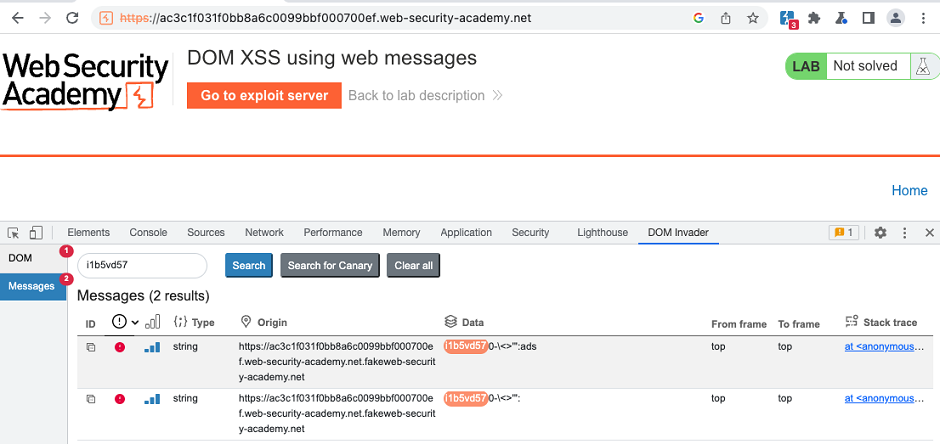
Once you enable web message interception, DOM Invader automatically logs any web messages that are sent on the page via the postMessage() method. By default, it also generates and sends its own messages to any message event handlers that it detects.
You can see these in the Messages view.

Automated web message analysis
By default, DOM Invader tries to identify and flag interesting messages on your behalf. It does this by modifying the messages in the following ways:
-
Injecting your canary via the message's
dataproperty. DOM Invader can use this to identify any sinks that this data flows into, just like it does with other sources in the DOM view. -
Replacing the origin of the message with a fake origin that starts and ends with the expected domain name. This enables DOM Invader to automatically identify event handlers that rely on flawed logic or regular expressions to validate the origin of incoming messages.
Note
You can disable both of these features from the DOM Invader's settings menu. For more information, see Web message settings.
Based on the observed behavior, DOM Invader automatically flags messages that it thinks are exploitable by displaying an estimated issue severity and confidence level. All messages sent on the page are listed with at least an Information severity rating, as they may contain vulnerabilities that DOM Invader can't detect automatically.
Message details
You can click each message to view more detailed information about it, including whether the origin, data, or source properties of the message are accessed by the client-side JavaScript.

This information can provide clues that help you to determine whether the message is useful, and how you might craft a suitable exploit.
Origin accessed
If the client-side code never accesses the origin property of the message, it is likely that the origin is not being validated. As a result, you may be able to send cross-origin messages to the event handler from an arbitrary external domain.
However, even messages in which the client-side code does access the origin property may still be insecure. You may still be able to bypass the validation. To help you find ways to do this, DOM Invader provides a link to relevant line in the code via a stack trace. For more information, see Studying the client-side code.
Web Security Academy
Data accessed
The data property of the message is where you inject potential payloads. If the JavaScript never accesses this property, it cannot be passed to a sink. In this case, the message is of no interest.
Source accessed
The source property of the message is a reference to the window object from which it was sent. In practice, this is usually a reference to an iframe. Websites often validate the source property instead of the origin as this is a more robust way of ensuring that the message came from a specific, trusted iframe.
As with the origin, keep in mind that client-side code accessing this property does not guarantee that the source is being validated, or that this validation cannot be bypassed.
Replaying web messages
DOM Invader enables you to modify and replay web messages, much like you can with HTTP requests in Burp Repeater. This makes it much simpler to probe for DOM XSS using web messages as the source.
To send a modified web message:
-
From the Messages view, click on any message to open the message details dialog.
-
Edit the Data field as required.
-
Click Send.
For example, you might identify a message where the event handler does not validate the origin and passes the data into the element.innerHTML sink. In this case, you could send messages to test whether characters like <, >, and " are escaped, then use these characters to create and send a proof-of-concept payload.
Generating a proof of concept
Once you successfully identify an exploitable vulnerability using a web message, DOM Invader can generate an HTML proof of concept that you can include in your reports.
To generate a proof of concept:
-
Select the vulnerable message to open the message details dialog.
-
Modify the values as required for your exploit.
-
Click Build PoC. The HTML is saved to your clipboard.
Read more
DOM Invader is highly configurable. For more information about DOM Invader's advanced features and how you can fine-tune its behavior for a particular site, see Web message settings.


