


Professional
Run your first scan
-
Last updated: June 18, 2026
-
Read time: 3 Minutes
Burp Scanner can be used as both a fully automated scanner and a powerful means of augmenting your manual testing workflow. The list of vulnerabilities that Burp Scanner can detect is constantly growing. We work closely with our world-class research team to make sure that it stays up to speed with the latest techniques for finding both classic bugs and newly discovered vulnerabilities alike.
Scanning a website involves two phases:
- Crawling for content and functionality: Burp Scanner first navigates around the target site, closely mirroring the behavior of real users. It catalogs the structure and content of the site, and the paths used to navigate it, in order to build a comprehensive map of the site.
- Auditing for vulnerabilities: The audit phase of a scan involves analyzing the website's behavior to identify security vulnerabilities and other issues. Burp Scanner employs a wide range of techniques to deliver a high-coverage, accurate audit of the target.
Note
Burp Scanner is only available in Burp Suite Professional and Burp Suite DAST. If you're using Burp Suite Community Edition, then you won't be able to follow this tutorial.
Burp Suite DAST users should see our tutorial on running your first scan with Burp Suite DAST.
Scanning a website
In this section, you'll learn how to launch your first automated vulnerability scan.
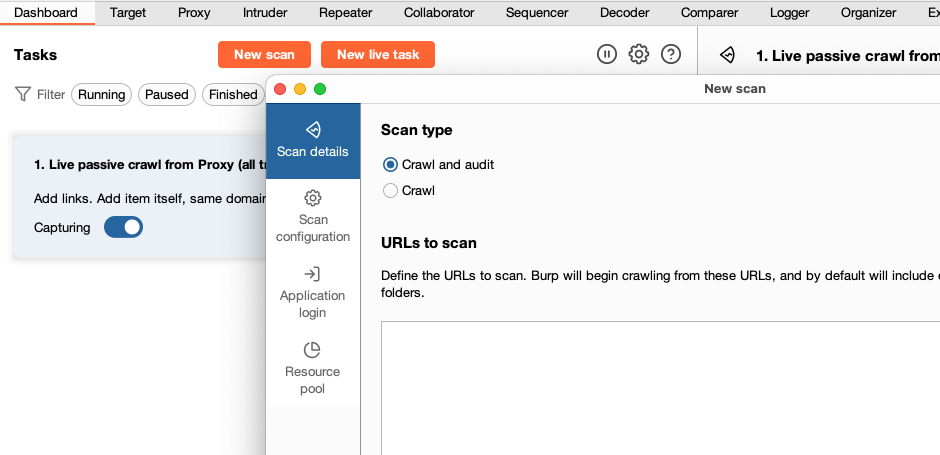
Step 1: Open the scan launcher
Go to the Dashboard tab and select New scan.

The Scan launcher dialog opens. This is where you can adjust various settings to control Burp Scanner's behavior.
Step 2: Enter the URL of the target site
In the URLs to scan field, enter ginandjuice.shop. If necessary, remove the URL for the website that you set as a target scope in the earlier tutorial Set the target scope. Leave all the other settings as their default for now.
Note
Using Burp Scanner may have unexpected effects on some applications. Until you are fully familiar with its functionality and settings, you should only use Burp Scanner against non-production systems. Do not run scans against third-party websites unless you have been authorized to do so by the owner.
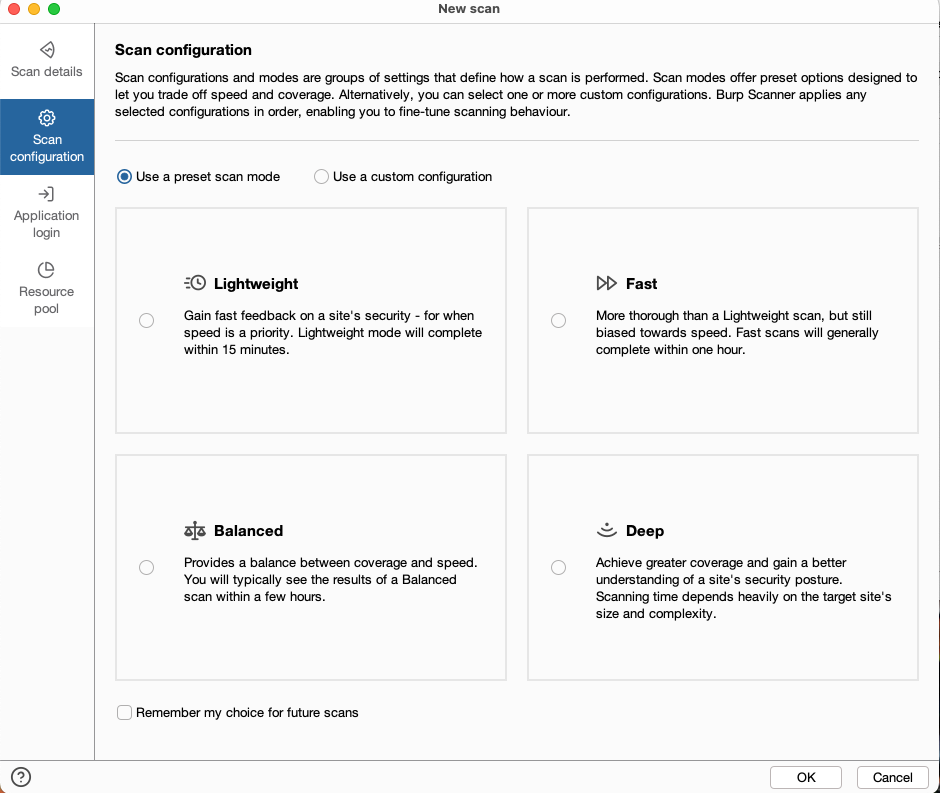
Step 3: Configure the scan
Select Scan configuration. From here, you can fine-tune many aspects of Burp Scanner's behavior to suit different use cases and target sites.
Make sure that Use a preset scan mode is selected and click Lightweight. The Lightweight scan mode is intended to give a very high-level overview of a target as quickly as possible. Scans using this mode run for a maximum of 15 minutes.
Step 4: Launch the scan
Click OK to launch the scan. Burp Scanner begins crawling from the URL you entered in the previous step.
Notice that a new task has been added to the Dashboard to represent this scan. You can select the task to view more details about its status and what it's currently doing.
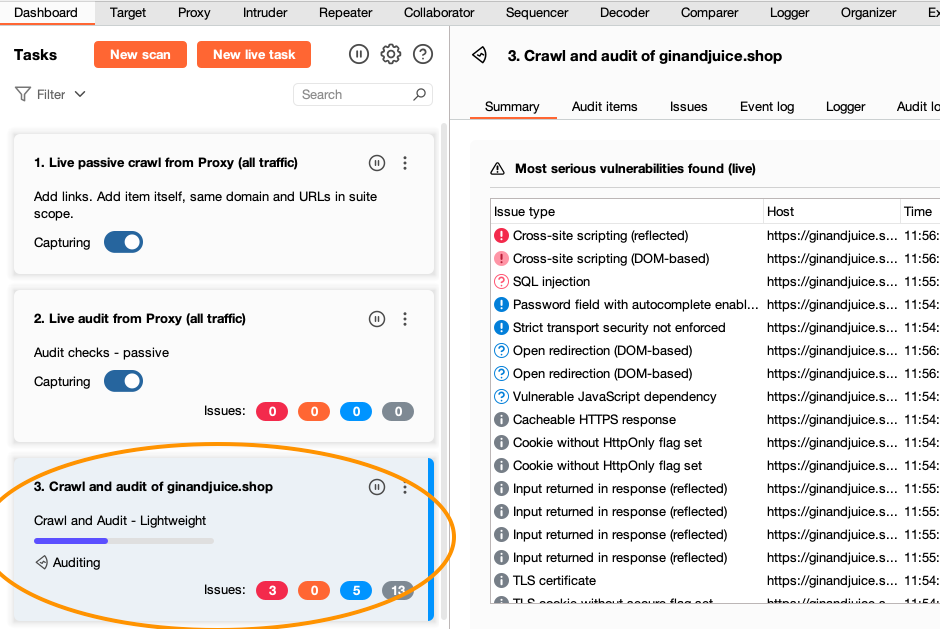
While your scan is running, proceed to Step 5.
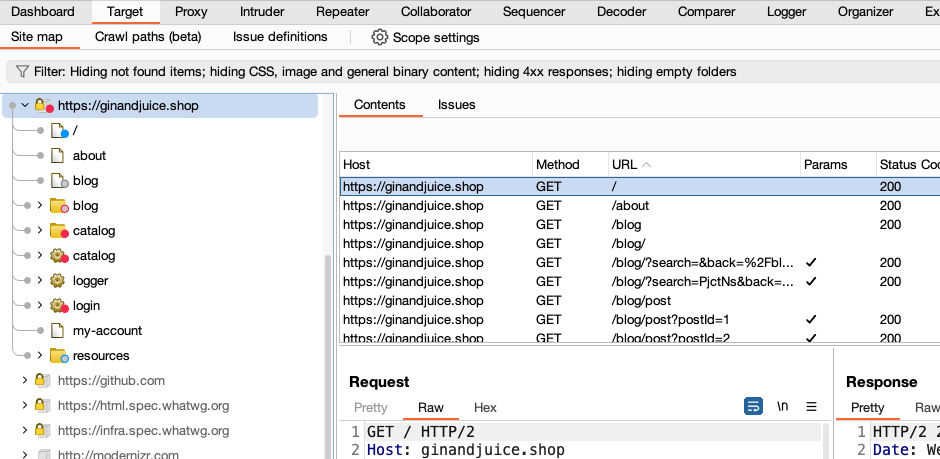
Step 5: See the crawl in action
Go to the Target > Site map tab and notice the new entry for ginandjuice.shop. Expand this node to see all of the content that the crawler has managed to discover
so far. If you wait a few seconds, you'll see the map being updated in real time.
Step 6: View the identified issues
Monitor the scan's status in the Dashboard tab. After a minute or two, the crawl will finish and Burp Scanner will begin auditing for vulnerabilities. To monitor the scan for any issues it finds, select the scan from the Tasks list. In the main panel, go to the Issues tab.
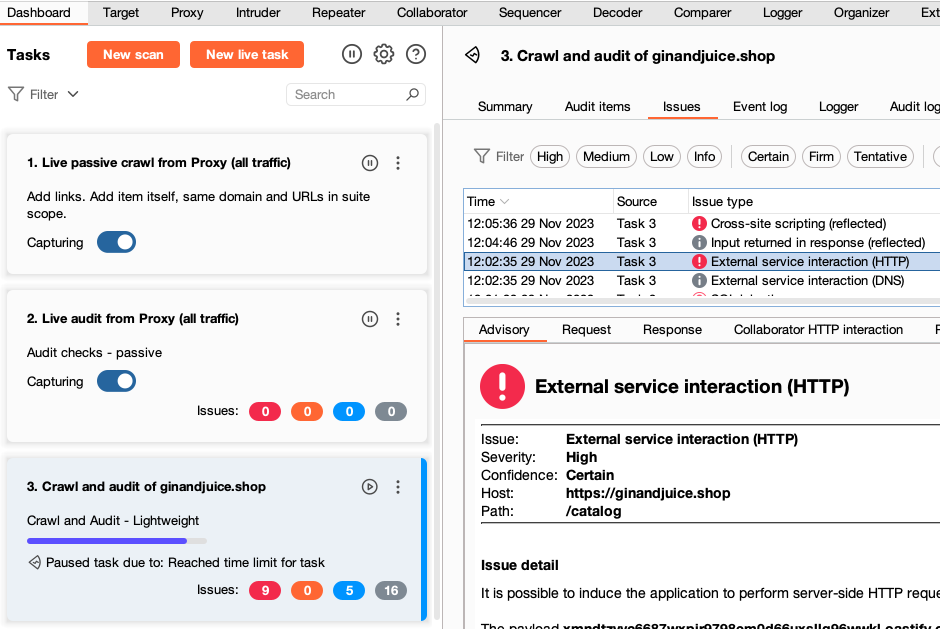
If you select an issue, you can see an Advisory tab, which contains key information about the issue type, including a detailed description and some remediation advice. Next to this are several tabs that provide evidence that Burp Scanner found for this issue. This is typically a Request and Response but will differ depending on the issue type.
You've just performed your first scan.
Next step - Generate a report
CONTINUE